Showing posts with label basics. Show all posts

Tuesday, August 13, 2013

Travel Makeup Ideas and Tips.

Heeeellllooooooo! As many of you know I will be going to Orlando for a Zumba extravaganza! I will be leaving tomorrow and am super excited about it. And since I have been so busy with work lately (sorry :/) I wanted to give you guys a much overdue post about what I will look like tomorrow :)

I know that many people do not think about makeup when they are traveling. In between packing, and last minute shopping, and remembering the tickets, makeup can seem daunting. Some don't think of it at all on an everyday basis, but if you do, keep reading. I also think that the more simple, non-makeup girls will get some tips for this. This is also a very go to makeup look that is perfect for everyday. I took a lot of the pointers from Makeup For Dummies and simplified it a lot, so if those tutorials were a bit much, I hope you find this post helpful.

Now on to the post!

Face:

I first started of with a cleansed, moisturized face and applied face primer. Mine is from Makeup Forever in #1. 

I then applied my foundation by dotting it all over my face and blending it in with my stippling brush. 


After that, I put on some concealer using a highlighting pen from Givenchy and literally drawing stripes on my problem spots, making me look like a bizarre tiger. I then blended that mess in with my fingers.

Roar?

For everything else on my face I used the following, in order from left to right. 
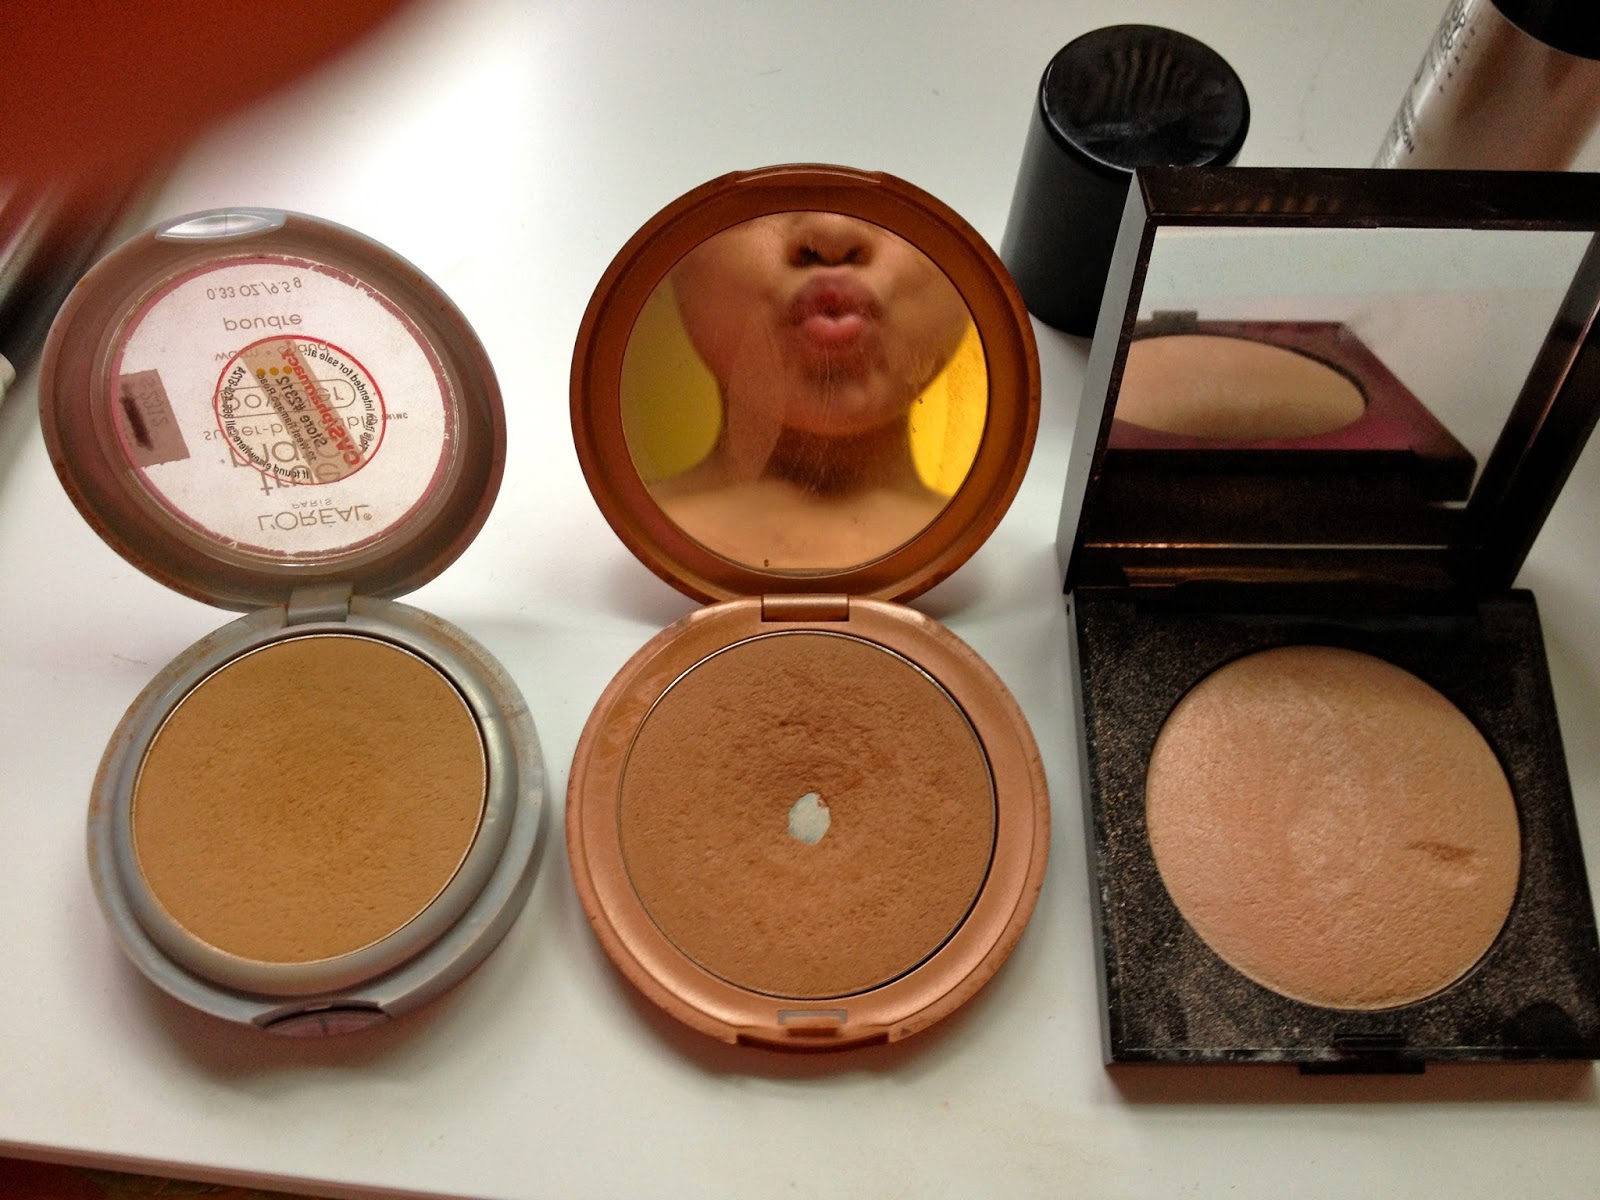
I kiss you!

I contoured my face with the L'Oreal true match powder with my angled face brush. Then went over that with my Stila bronzer for some added pizazz. I then highlighted with my Laura Mercier highlighting powder. I used the same brush for all of these steps, cause ain't nobody got time to use more than one.
Highlighting

Bronzing


Eyes:

First thing's first. Eyebrows. You already know! Brush, fill, brush once more, and set it.


 Prime your lids first with some find of base and go in with a light shimmering eyeshadow. I used one from an Urban Decay Palette, but anyone would do. This will just make your eyes look nice and bright, no matter how zombie-like you feel inside. We all know traveling can be draining. I took that color and blended it from my lash line all the way into my brow bone. Don't forget to get the tear-duct as well. That way your brow and inner corner highlight is done already.


Then take a soft brown color and blend that into the crease and outer corner. I even took what was left on the brush and applied it under the eye too for some soft definition.


Next, take a black liner and line the upper water line. To do this I kind of look down and run the pencil back and forth. This will define and make the lashes appear fuller without having to apply liner on the top. See how much more defined the left eye looks?


Then, line the outer third of the lower waterline. 
\

Now all you gotta do it curl and mascara your lashes and you are done! See? Wasn't that easy? For the lips you can do whatever you want. I chose a pink gloss, because its fast, easy, and low maintenance. But if you wanna just do a lip balm or slap on some red lipstick, then do you girl haha.


Other Tips:

  • Bring food. Sandwich, carrots, apples and peanut butter, granola bar. Anything to keep you going. 
  • Bring something to occupy your time as you wait, or even for on the plane. Things like books, cards, crossword puzzles.
  • Take your own blanket along so you won't have to pay for one on the plane. 
  • Take a sweater with you. I like those big comfy cardigans, because the plane is sometimes cold. I'm going to Florida, so I will be dressed for warm weather. So, this sweater idea is perfect for me when I am stuck on a freezing plane.
  • Throw some headphones in your carry on in case you want to watch a movie, or listen to music.
And there you have it. I hope all of you get something out of this post. Leave comments below! You can also comment me on my Instagram and Facebook, or shoot me a tweet. 

Have an awesome day, everyone!!!!
Nicole xo


Friday, August 2, 2013

Tips on Brushes and How to Clean Them

Hey, baby. Hey, baby, hey! Boys say, boys say. Hey, baby. Hey, baby, hey! All the boys get the girls in the back! 
I thought you could all use some throwback No Doubt in your life! Ha ha. Well today's post is all about brushes, baby. How to clean them and which ones to use. Let's get started.

The Essential Eye Shadow Brushes

In my Makeup For Dummies posts (in the July Archive down below) I went over the main face brushes  you will need to get a flawless face. Well, today I will be showing you the most important brushes that every girl- boy/girl, girl/boy, whoever you are- needs. 

From left to right:
Urban Decay brush, and the other two are from Mary Kay.


These beauties are your basic eye shadow brushes. They are not too small, or too fluffy. I use these for pretty much everything. You do not need to get more than one. I do because I use many colors whenever I do my eye shadow. The one on the left is a bit stiff to allow a more solid application. It also helps with getting into that inner corner, since it doesn't move all over the place.

MAC 208 brush


You must, I repeat, must have this in your makeup collection. This little guy is called an angled brush and it can be used to fill in brows, line upper and lower lash lines, and be used to flawlessly apply gel liner. Get it? Got it? Good.


A fluffy angled brush is perfect for when you want to get into the crease of the eye, but want it to spread over a larger area. It is also cool to use it on the lower lash line if you are the kind of person who loves a lot of smokiness under the eye. This brush I actually got from CVS and it was super cheap. It came in a set :)


A dome shape brush is also for the crease and can be used on the lower lash line. However, unlike the fluffy angled brush shown above, it is not fluffy giving you a more focused application. This also came in the brush kit from CVS.


I have no idea how to spell the name of this brush. It is pronounced like this, spool-ie. So there you go lol. It isn't exactly a must have, but it is a god send. Your brows will never be the same after you use this. I use it to comb through my brows after filling them in, and it looks so much more natural. This is from a company called, Neewer.


This brush is my friend. He too came from the planet, Neewer and I am so glad. It is super fluffy which makes it perfect for blending. As you know from reading my blog, blending is very importante.


If you want a thinner line than a dome brush, but a bigger line than a small angled brush, then you need a pencil brush. I use this all the time when creating my purple line under the eye. I really recommend getting a brush like this. (Brought to you by CVS).

Brush Cleaning!

A lot of people use fancy brush shampoos. I use this:


It is antibacterial (kills germs), has a moisturizer (conditions brush hairs as you clean them) and smells hella good (bonus!).

Remember this is simply my method of cleaning brushes that I think will work for everyone. I do this every couple weeks and always do it before and after doing makeup on clients. It is super important to clean your brushes, especially if you are oily or acne prone. All you will need are your soiled brushes, my homeboy Dial, and some paper towels. Oh and a sink that works, preferably.

Step One:

Pump soap into hand.


Step Two:

Wet brush under lukewarm water.


Step Three:

Dip brush into the soap in your hand and swirl it around until you create a lather. You will see all the gunk in your brush and be see why your brush needs to be cleaned. Trust me. Even I am amazed at how orange the water is when cleaning my bronzer brush ha ha. Cute!


Step Four:

Rinse under the water, still swirling the brush in your palm to get all the germs and soap off.


Step Five: 

Get water out of the brush by running your fingers down the brush so that the bristles are straight, and going in the direction the brush is when its dry. So you you want this:


Not this:


See its not so bad. Just repeat this process with all of your brushes and lay them on a paper towel to dry. 


So fresh and so clean, clean.

Obviously in between eye shadows I can submerge my brush in water, so to clean in between I have this:


I just used a bright blue eye shadow and now have to use a white one. Whatever will I do? Simply spray the brush and rub it on a paper towel and bingo-bango the brush is rid of crazy blue color. This won't deep clean the brushe, but will get you by when you are in a hurry. You can also do this on face brushes. For example, if you use a brush for both your blush and bronzer, and don't want your blush to be dark brown or orange. Oh and I got this at Sephora of course :) 

Well I hope everyone found this helpful! I have actually been asked a lot on how I clean my brushes and what brushes I use for eye shadow, so here are those questions answered. Enjoy the rest of your day :) 

Do you clean your brushes?
What are your go-to eye shadow brushes?

Talk to ya girl! 'Till next time,
Nicole xo

Wednesday, July 24, 2013

Struck by Lightning

Hey guys! :)
If you are wondering why I am smiling it is because I have the day off and finally have been able to do things that I want. I have mostly just been working on my social media things and things with the blog. In case you don't know I also have a Facebook, Instagram and Twitter. So if you want to be updated on posts you can follow me on those :) I put lots of the pictures that are on the blog on all those as well, so definitely check it out. I will link everything down at the bottom.

Today was not so bad, weather wise. The heat wave has finally passed! It is still nice and warm, though. Since the weather was nicer today, I was feeling the very light summer air and decided to go with a light makeup application. At work yesterday I made a sample of Josie Maran's Matchmaker Foundation:


And Josie Maran's Argan Infinity Cream:


I used the cream as my primer and put the foundation right on top. It literally feels like nothing is on my face! Plus all of Josie Maran's products are organic and infused with Argan Oil. I know you guys are thinking that putting oil on your skin is bad. Not true. Good oil takes out bad oil. Especially in these summer months, we are constantly letting moisture out of our bodies and have to replenish that moisture. When our skin does not quench its thirst, it will go into survive mode and make more oil. This causes, obviously, oily skin and outbreaks. The foundation is cool too because it actually goes on white and adjusts to your skin as you blend. I thought it was b.s. too, but it really works guys! My skin looks so radiant, not oily or shiny.


And on my lips I wanted something more natural too. I have had this Revlon Kissable Lip Balm for a couple months, and decided to pop it on since it had that light coral I was looking for. 


They look like this, in case you wanna grab one. You know you do :) Mine is the third from the left called, Rendezvous. On to add a little shine I put on my Revlon Lipgloss in the color, Bellini.

I'm also really excited to share with you guys how I do a very special eyeliner trick. Yesterday I put these photos on Instagram and got a lot of positive feed back:


That's right baby! Lighting eyeliner. I did it once before and this time around came out so much better. So don't be intimidated. When I did it over again today for you guys it came out even better-er. Practice makes perfect :) So grab your favorite liquid liner and get ready. Okay so here is how I did it. First start out with a regular line on the top lash line. Go as thick as you want.


Now starting from that line, make another line going to the crease. Like so...


Note: The inside does not need to be perfect because we are gonna fill in later. Now you want to draw a line from that one going into the crease, making a Z like formation.


From that line make a straight line going up and out. Use the end of your brow as your guide. Go out as  far as you want.


Start from the tip of that line and work your way down, mirroring what you just did. 

 Boom.
 Bam.

Until a the lightning bolt shape is formed. Now open your eyes, and just like in cat my cat liner post, place the liquid liner tip at the outer most corner of your lower lash line. From there make a straight line to connect and close the lightning outline.


I think it looks pretty cool like this too, but I was not super neat on the inside so I simply filled it in.


Cool, huh?


See how different the eyes look!? I love it. I got a lot of compliments on it yesterday. That was my proof that I didn't look completely ridiculous and thought I'd share something different with you guys. I think I might actually do this look, like, all the damn time ha ha!

So give it a try and don't be afraid. You are fabulous! Oh and if you wanna get the eye shadow look just click here to see my tutorial post on it. 

My Info!
Twitter- Follow it: @NGMthatface
Instagram- Follow it: @NGMthatface
E-mail- Send it: ngmthatface@gmail.com

Yeah, so there you go guys! We covered skin care, foundation, lips, and liner all in one day. That's a lot. I'm actually quite tired ha ha. Not to mention you all now know how to stalk reach me :) You know how I love to hear from you. So please, comment or send me a message! 

Besos!
Nicole xo.